
Vinyl floor tiles are a great choice if you want to give your floors a fresh new look without spending too much money. They are strong, stylish, and simple enough to install on your own. Whether it’s your kitchen, bathroom, or any room that needs a fresh look, vinyl tiles are dead easy to work with.
We’ve helped loads of mates with their flooring over the years, and vinyl tiles are always our top recommendation for beginners. You don’t need modern tools or any experience. Just follow these steps, take your time, and you’ll have a floor that looks like it cost twice what you actually paid.
Why Vinyl Tiles Are Perfect for Your Home
Let’s be honest – most of us want flooring that looks amazing but won’t cost a fortune. That’s exactly what vinyl tiles offer. They’re completely waterproof, so you don’t need to panic when someone spills their tea or the kids track in mud from the garden.
The choice these days is mental – you can get tiles that look exactly like proper hardwood, natural stone, or fancy marble. Plus, if you accidentally damage one tile down the line, you just pop out that single tile and stick in a new one. Try doing that with laminate flooring!
Easy Steps to Lay Vinyl Floor Tiles
What You’ll Need to Get Started
Right, let’s sort out what you need before you begin. Nothing worse than getting halfway through and realising you’re missing something important.
Tools you’ll need:
- Tape measure (everyone’s got one lying about)
- Chalk line or a long straight edge
- Sharp craft knife with spare blades
- Rolling pin from the kitchen (or buy a proper floor roller)
- Pencil
- Spirit level (2-foot one will do)
Materials to buy:
- Vinyl floor tiles (always buy 10% extra)
- Floor adhesive (only if you’re not using stick-down tiles)
- Primer for concrete floors
- Cleaning bits and bobs
Your local B&Q or Wickes will have everything. If you don’t want to buy tools you’ll only use once, most hire shops rent them out cheaply.
Getting Your Floor Ready Properly
Here’s where most people mess up – they rush this bit. Your shiny new tiles will only look as good as what’s underneath them, so don’t cut corners here.
Strip out all the old flooring and give everything a proper clean. Check for any loose floorboards or squeaky spots and sort them out now. Vinyl shows up every little bump and dip, so your subfloor needs to be spot on.
Get yourself a long straight edge and check the floor is level. Sand down any high bits and fill in the low spots with levelling compound from the DIY shop.
Once everything’s level, give it a final clean with a slightly damp mop and let it dry completely. Any dust or grit will cause problems later.
Finding Where to Start
This step matters a lot even though many do not realize it. Never start laying tiles from a wall – walls are hardly ever straight, even in new houses.
Measure your room and mark the middle of each wall. Use your chalk line to snap lines between opposite middle points. This gives you a proper cross right in the centre of your room.
Now lay out a row of tiles along each line without sticking them down. This shows you how everything will fit and lets you shift things about if you’ll end up with tiny slivers at the edges. Proper planning here saves you grief later.
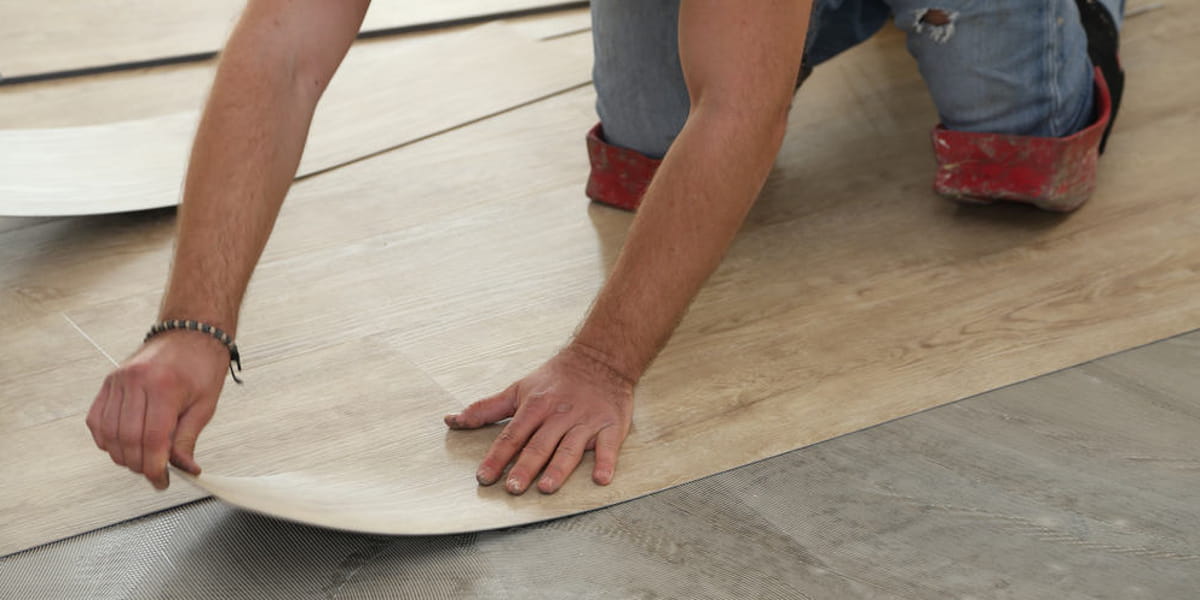
Laying Your First Tiles
This is the fun part where you start seeing results. Always begin at the centre where your lines cross and work outwards like building a pyramid.
If you’ve got peel-and-stick tiles, carefully peel back the protective film from your first tile. Line it up exactly with your chalk lines and press it down firmly from the middle outwards. Get all the air bubbles out – they look rubbish if you leave them.
For tiles that need separate adhesive, spread it with a notched spreader following what it says on the tin. Don’t do too much at once or it’ll go off before you get the tiles down.
Each tile should fit snugly against the next one without gaps or overlaps. Take your time with the first few – they set the pattern for everything else.
Working Out Towards the Walls
Keep going with your pyramid pattern, always working from the middle outwards. This keeps everything straight and centred properly.
Keep checking you’re still lined up with your original marks. It’s dead easy to drift off course, and small mistakes get bigger as you go.
When you get to the walls, you’ll need to cut tiles to fit. Measure twice, cut once. Mark your cutting line on the back of the tile, score it deeply with a sharp knife, then bend it to snap cleanly.
For awkward shapes around pipes or radiators, make a paper template first. Much easier than trying to measure and guess.
Finishing Off Properly
Once all your tiles are down, go over the whole floor with a heavy roller or that rolling pin. This presses out any air pockets and makes sure everything’s stuck down properly.
Put your skirting boards back up, leaving a small gap between the floor and wall for expansion. Floors move about a bit with temperature changes – that gap stops tiles from buckling up.
Don’t put heavy furniture back for at least 24 hours. Give the adhesive time to do its job properly.
Don’t Make These Common Mistakes
We’ve seen these mistakes loads of times, so learn from other people’s errors:
- Don’t skip the prep work. A bumpy subfloor means a bumpy finished floor, and there’s no fixing that once the tiles are down.
- Never start from a wall unless you’ve checked it’s dead straight with a spirit level. Most walls bow out or lean slightly.
- If your tiles have a wood grain pattern, stagger them like bricks rather than lining them all up. Looks much more natural.
- Let your tiles sit in the room for a couple of days before laying them. They need to get used to the temperature and humidity.
Looking After Your New Floor
Your vinyl floor will last for years with hardly any effort. Just sweep or hoover regularly to stop grit scratching the surface. Mop with warm water and a bit of floor cleaner made for vinyl.
Don’t use bleach or harsh chemicals – they’ll damage the surface. Chuck some mats down by the doors to catch dirt before it gets tracked through the house.
Conclusion
Laying vinyl tiles yourself is one of those jobs that sounds harder than it actually is. With a bit of planning, the right approach, and patience, you’ll end up with a floor that looks like you paid professionals to do it.
The secret is taking your time with the preparation and not rushing any of the steps. Remember, even the pros weren’t perfect on their first go, so don’t expect miracles straight away.
Want a professional finish without the DIY hassle? Contact GSM Builders Ltd for expert vinyl flooring installation. We’re specialists in all types of flooring work and guarantee results that’ll make your home look fantastic. Our experienced team handles everything from start to finish, so you can sit back and enjoy your beautiful new floor.